Mounting an Engineer Print

Engineering prints, blueprint, architecture print; whatever you call them, buying and mounting giant, cheap prints is all the rage these days. There are a lot of blogs and sites and such telling you ‘all about’ how to make these nifty DIY mounted prints, but I have yet to find one that is a true step-by-step guide on what to do (and what not to do). So here is my stab at a guide.
 Here is everything that you need to make your very own mounted engineering prints:
1. Your giant print
2. Foam board (you can also use construction-type foam board for a thicker mount)
3. Drop cloth
4. Scissors (I like these Fiskars little tiny pointy ones)
5. Xacto knife
6. Picture hanging wire
7. Picture mounting rings (you could use saw-tooth hangers instead of the wire and rings, but this is a much easier way to hang your mount and actually get it level)
8. Super glue (or other adhesive)
9. Spray adhesive (I use 3M Super 77)

 10. Tape measure/ruler
11. Clear spray finish (optional, but the best way to protect your print from time and wear and the sun)
12. Wire cutters
There is one other thing you’ll want while doing this project – a room with a fan and an open window. The spray glue and finish are both fairly fumy, so you’ll want plenty of ventilation.

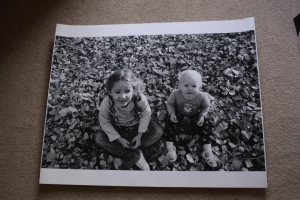 I got my print made at Office Depot. I changed my (hi-res) photos over to black and white (and made all my fine-tuning adjustments), plopped them on my trusty thumb drive and stopped by the store. I asked for engineering prints (they’re actually called ‘blueprints’ at the Office Depot print center) and received an awesome print that was about 20″x30″. They are very good quality for a $3 printout. If you have a photo with large dark areas you may notice some blotchiness in those places, simply because they are printed with toner and not photo ink (this particular print didn’t have that issue).
 To begin the process of mounting your print you’ll need to get out your print and tape measure and figure out exactly what size you want it to be (you’ll want to leave at least an inch margin on each side). I like to use a 2×3 ratio when I’m cropping my pictures, so this one ended up being 18″x27″.
 Next, transfer your measurements to the foam board (I used white crayon, since it was a black board) and trim it to size with your xacto knife.
 Once your foam board is sized you’ll want to line up your print so that it’s positioned correctly for mounting, making sure to leave at least an inch or so of margin around the entire print. To do this I held the print and board up to the window, showing the outline of where the board lined up with the image. Set the print and board down onto the dropcloth, holding them together carefully so they don’t shift.
 Loosely fold back the near half of the print and spray the visible board with a layer of adhesive (smooth sweeping motion – 8-10″ away from surface – follow can directions). Wait about 10 seconds or so and carefully roll the paper down onto the adhesive, smoothing as you go (you don’t have to wait, or you can wait 5 minutes if you like, I just find that after about 10 seconds there is a good, strong level of tackiness in the adhesive). Repeat this step for the other side, taking care to avoid the paper getting scrunched in the middle (I never had an issue with this – just noting it as a precaution).


 Once the paper is glued and smoothed crease the top and bottom front edges along the foam board. Flip the board over and crease up and over the back, taking care to keep the creases tight against the edge of the board. Use a scrap piece of foam board to carry the creases all the way to the end of the paper.
 Next up is the actual cutting of the print. Not much cutting, but it’s a pretty important step. I actually glued my flaps before I cut them, but I would advise cutting first. You’ll want to use your cute little tiny scissors to cut out each corner on the back, along the edge of the board and also along the edge of the Back crease. Then you cut along the front crease, but leave the little edge strip attached. Now you’re ready to glue down the top and bottom flaps in the same manner that you did the main piece.
 Once those edges are glued continue on to the sides, creasing first the front, then around the back side. You will tuck the little strips in (nice and snug) along the edge of the board and then glue down the main flaps.

Corner with tucked strip

Corner without tucked strip
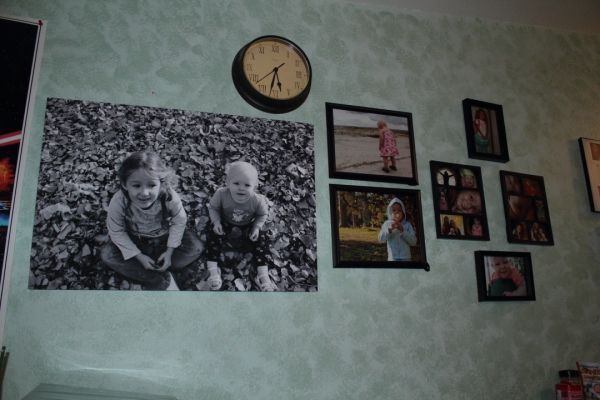
The little strips don’t seem like much, but they do add a much more finished look to the corners on your completed piece. Now then. You have just successfully mounted your very own engineering print. If you want to set it up on a shelf instead of hanging it and you don’t want to clear coat it for longevity, you can stop reading now.

 Now to attach the hanging hardware. This is a pretty easy step. (as opposed to the Super hard stuff we just did, right? I know..) First, you’ll take your little picture mounting rings and find the placement for them. You’ll want them about 1/4 or 1/3 of the way down the board (make sure it’s right side up) and a little bit in from the sides – an inch or two will do. Press in the rings (with the handy little spikes) at about a 45° angle towards the center. Next, take your picture wire and run it through the first loop with 2″ or so of extra hanging through. Run it over to the second loop with about the same amount of extra, making sure the wire won’t go above the top of the board when pulled up.
  Cut the wire to length with your handy-dandy wire cutters and then bend the ends around the loops. Pick up the ring, twist the wire back onto itself, then place a few drops of super glue on the ring and put it back in the holes that the prongs made a few steps ago.
The final part of this project is the clear coat. I used Krylon Matte Finish spray. It keeps the sheen of the print the same, but adds the protection that it needs. The key with spraying on the finish is smooth, even, LIGHT coats – especially when using a matte finish, as heavy coats can make for a frosty appearance. I ended up putting on about 4 coats. This stuff dries almost instantly when you’re doing nice light coats and you can recoat in 2 minutes. After about 15 minutes of dry time (and less total time than I spent writing this post!) you’re ready to hang and enjoy!

Thank you! I did this project slap dash and wasn’t happy so I am doing it over tonight. I really could not figure out how to mount them, you helped.